
You might have needed to log into the same service with different accounts, only to find out you can only be logged into one account at a time. For example, if you are logged into your personal Instagram account from any browser and you try to log into your alternative or business account, you cannot just open a new tab and log into it there. You’ll have to log out of one account, log back in with the other account, check what you need, then log out again to get back to your personal feed. That’s not multi-accounting. Imagine doing this with five accounts. Or dozens of client accounts on top of your own.
It simply isn’t possible on regular browsers. They only allow you to use one account per website at a time. To use more than one simultaneously, you need special browsers that support multi accounting. Yes, such browsers exist. You can configure proxies on multi account browsers and log into any website with an unlimited number of accounts.We’ll demonstrate how these browsers and proxies work in tandem, but first, let’s understand multi-accounting in detail.
What is Multi Accounting?
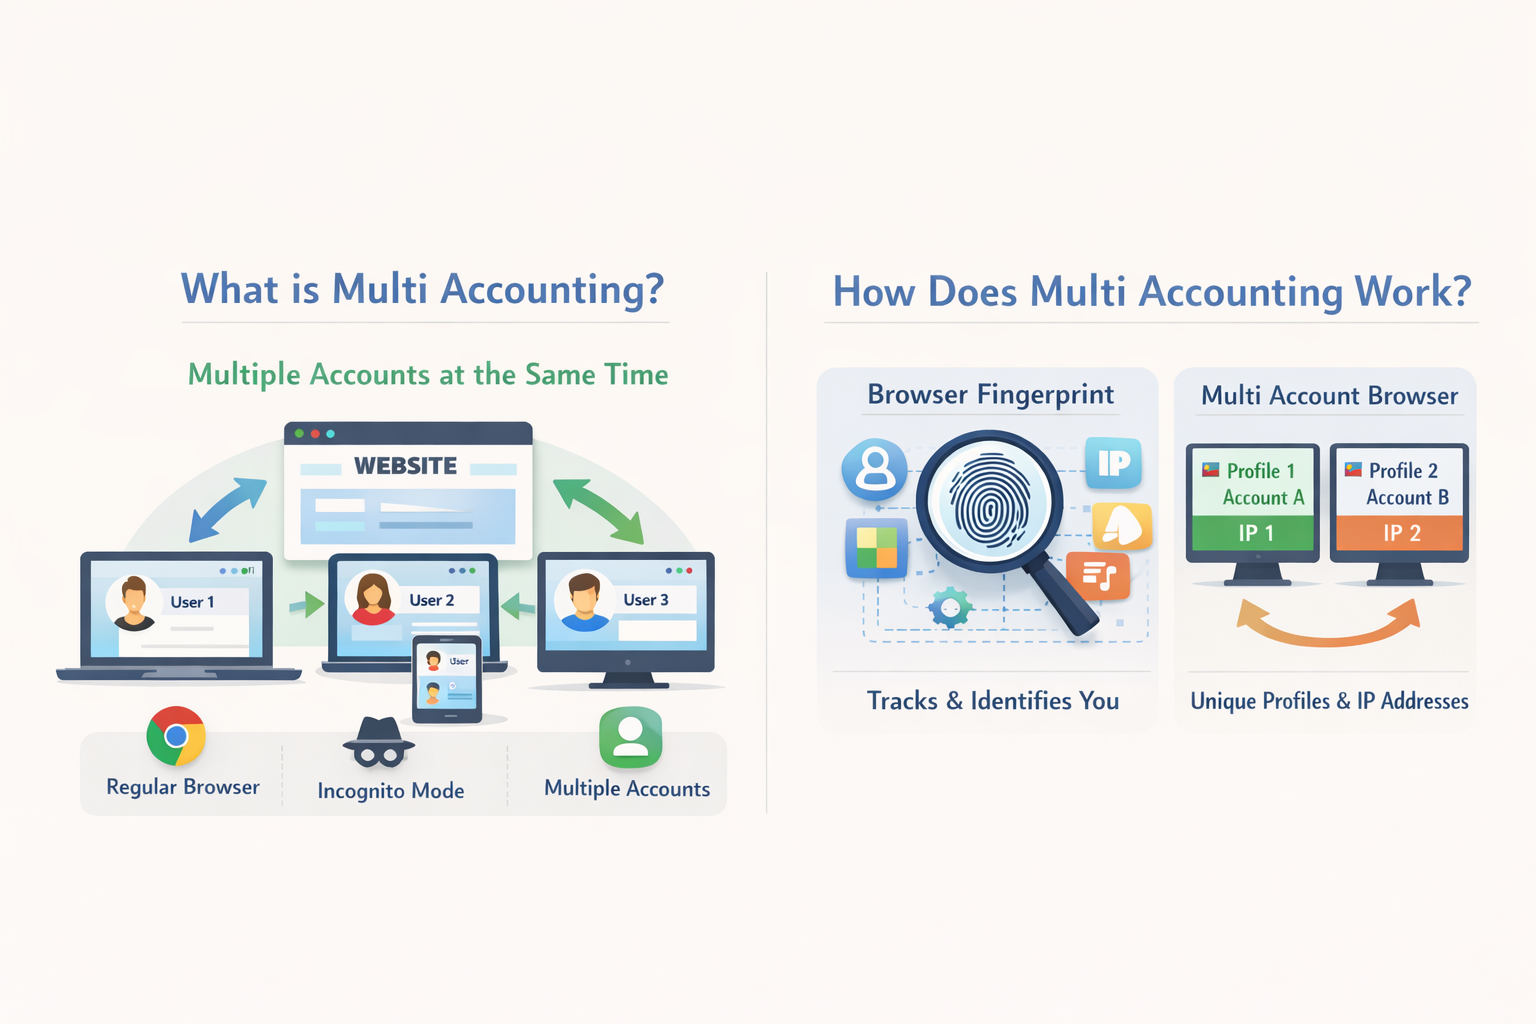
Multi accounting is the practice of running multiple accounts on the same website or platform at the same time. The emphasis here is “at the same time”. When the accounts are all logged in at the same time and are being used, that’s what you call true multi-accounting.
As I mentioned earlier, a regular browser, like Chrome or Firefox, allows you to run only one account per website at a time. Sure, you can open an incognito window for a second account, but that’s pretty much where your options end. Not to mention, an incognito approach isn’t suitable for long-term usage as it is designed to forget things when you close it. So you’re left with creating a new browser profile. But creating a new browser profile on Chrome, for example, requires a new Google account. And you cannot realistically keep creating new Google accounts as your multi-accounting needs grow, can you?
Then, How Do You Perform True Multi Accounting?
Through special browsers called multi account browsers. These browsers let you create separate browser profiles for each account without requiring any prerequisites like a Google account. You just create a new browser profile with a mouse click. It feels as easy as opening a new tab.
You can log into different services with one account in a browser profile. Then, create a second browser profile and log into the same services with another account. Keep creating browser profiles and repeating the same process until you have logged into all your accounts.
How Does Multi Account Setup Work Exactly?
Now let’s discuss the technical side of things.
When you visit a website, your browser sends a lot of information about you to that website. Not just your IP address, but also things like:
- Your screen resolution
- The fonts you have installed
- Your timezone
- What graphics card you’re using
- And even how your device processes sound
The websites combine all this data to create what’s called a browser fingerprint. And just like your actual fingerprint, it’s pretty much unique to your device. Hence, it’s referred to as a fingerprint. Websites use this fingerprint for multiple purposes. The purpose that concerns us right now is identification. Websites identify you through your browser fingerprint. So if you run multiple accounts from the same device and the same browser, websites can think you are trying to imitate different people and might suspend or ban your accounts.
How Do Multi Account Browsers Make Multi Accounting Possible?
Multi account browsers get around detection by giving each profile its own unique fingerprint. So when you open Account A in Profile 1 and Account B in Profile 2, the website sees them as two completely different people on two completely different devices. For further security, you can assign different IP addresses to each profile using proxies. This makes it look like the accounts are being run from different locations, not just different devices.
What are Antidetect Browsers and Proxies?
An antidetect browser is actually what we’ve been calling a multi account browser. It’s software that allows you to create isolated browser profiles, each having its own fingerprint. Suppose you have multiple computers, but all those computers are running from one device, and that’s exactly what an antidetect browser (multi account browser) does. A proxy, on the other hand, is a server that does the job of a middleman between you and the internet. When you connect to the internet using a proxy, websites see the proxy’s IP address instead of yours.
Now, if you’re thinking “But why do I need both?”, it’s because:
- The antidetect browser changes your device fingerprint
- And the proxy changes your location
One account might look like it’s running from a Windows laptop in New York, while another appears to be on a Mac in London. So if you combine them, then you can get two completely separate identities online which will protect you from getting flagged or banned.
Note: For demonstration purposes, I’ll be using Gologin and Floppydata proxies. Gologin is one of the most popular multi-account browsers out there, which is known for having a clean interface that doesn’t overwhelm users with options. It handles fingerprint management automatically for each profile you create, which takes a lot of the technical headache out of the process. I’ll be using Floppydata for proxy configuration because Floppydata proxies work well with multi-account setups. If you’re following along with me, you can use Gologin’s free plan to test things out.
How to Use Floppydata Proxies with Gologin Browser for Multi-Accounting?
Now let’s show you how you can practice multi accounting using Floppydata proxies on the Gologin multi-account browser.
The entire process is just a few easy steps.
1. Download and install Gologin
You’ll have to grab the Gologin browser for your respective operating system from their official website.
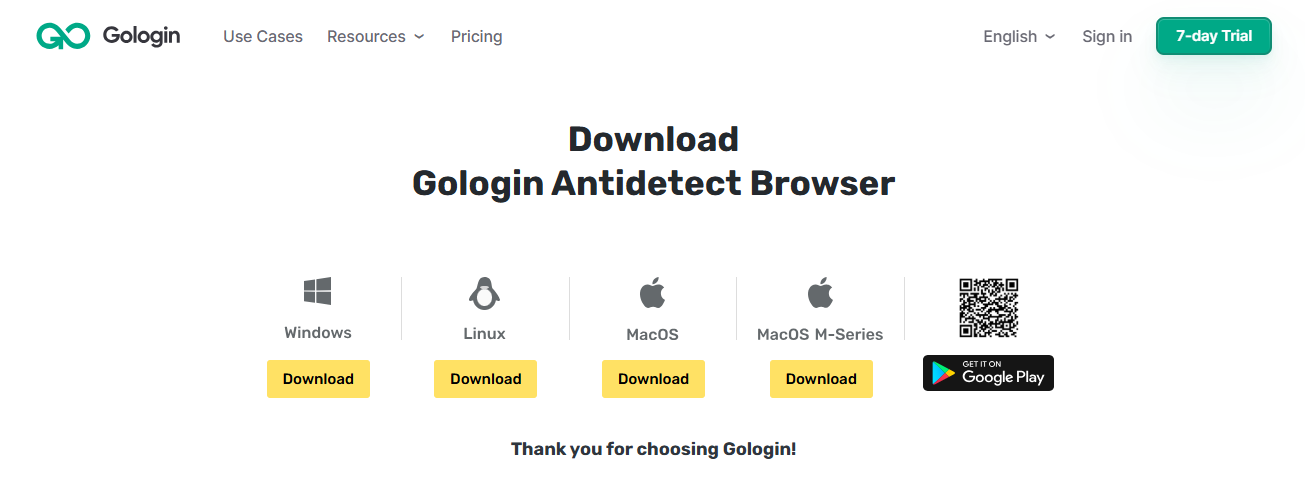
Install it and sign up using Google or email. Your 7-day free trial will start, which gives you access to almost every Gologin feature.
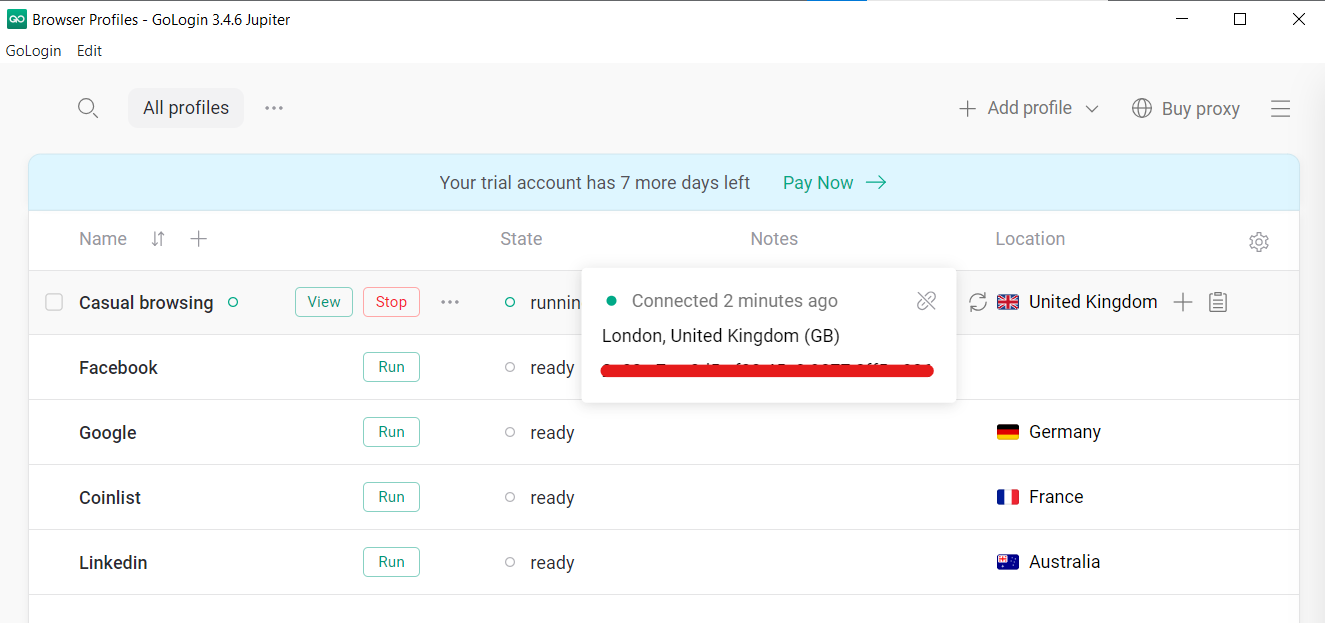
2. Create browser profiles
Now you need to create a browser profile for each of your accounts. Click the “+ Add profile” button at the top of your Gologin dashboard.
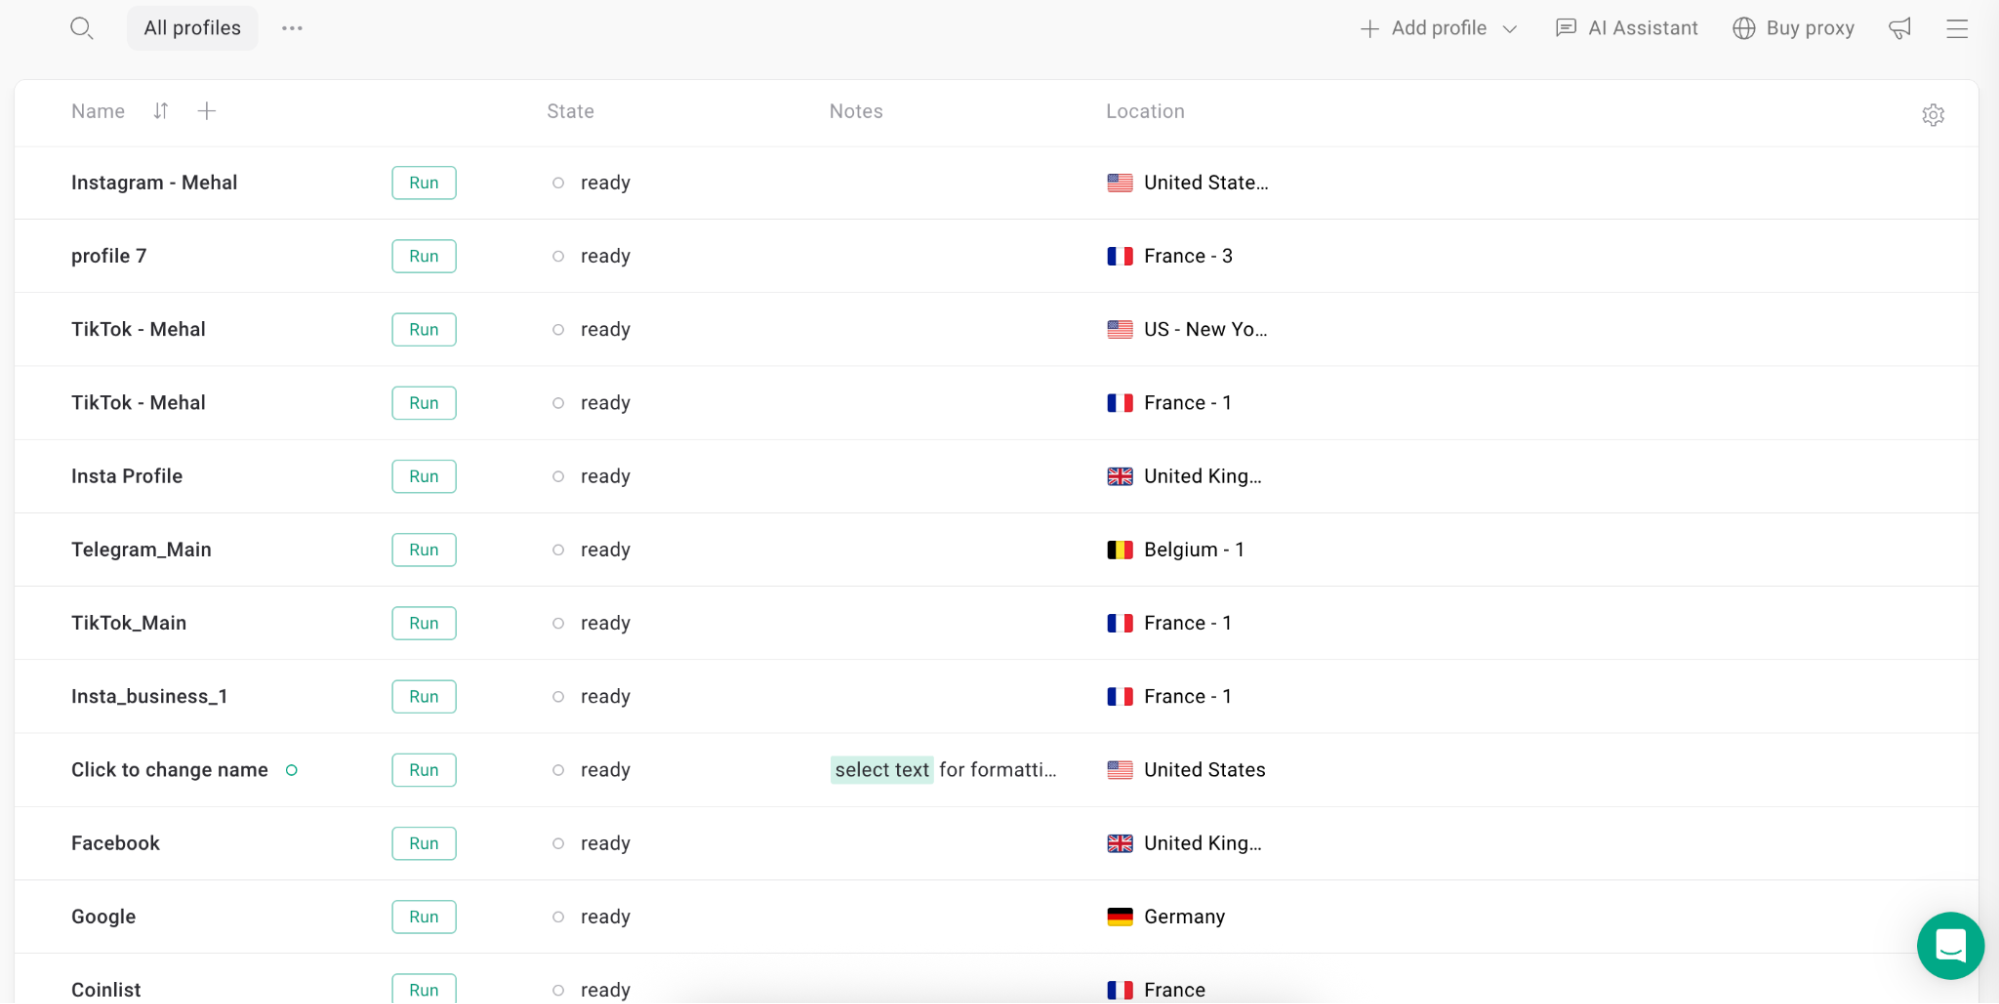
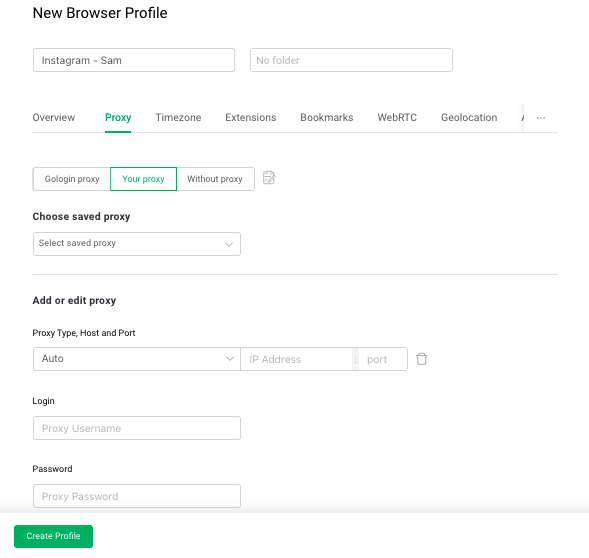
You should name this profile something suitable. For example, if you’re going to use it for an Instagram account of a client named Sam, name it “Instagram – Sam”. This is just an example. You can come up with your own naming convention. Apart from naming, you also get an option to configure a proxy in Gologin.
3. Configure Floppydata Proxy
To configure a proxy in Gologin, you first need to get your proxy details. Go to your Floppydata dashboard and choose the proxy you want to configure on Gologin.
Note: For a full guide on how to import Floppydata proxies in Gologin, you can read our guide.
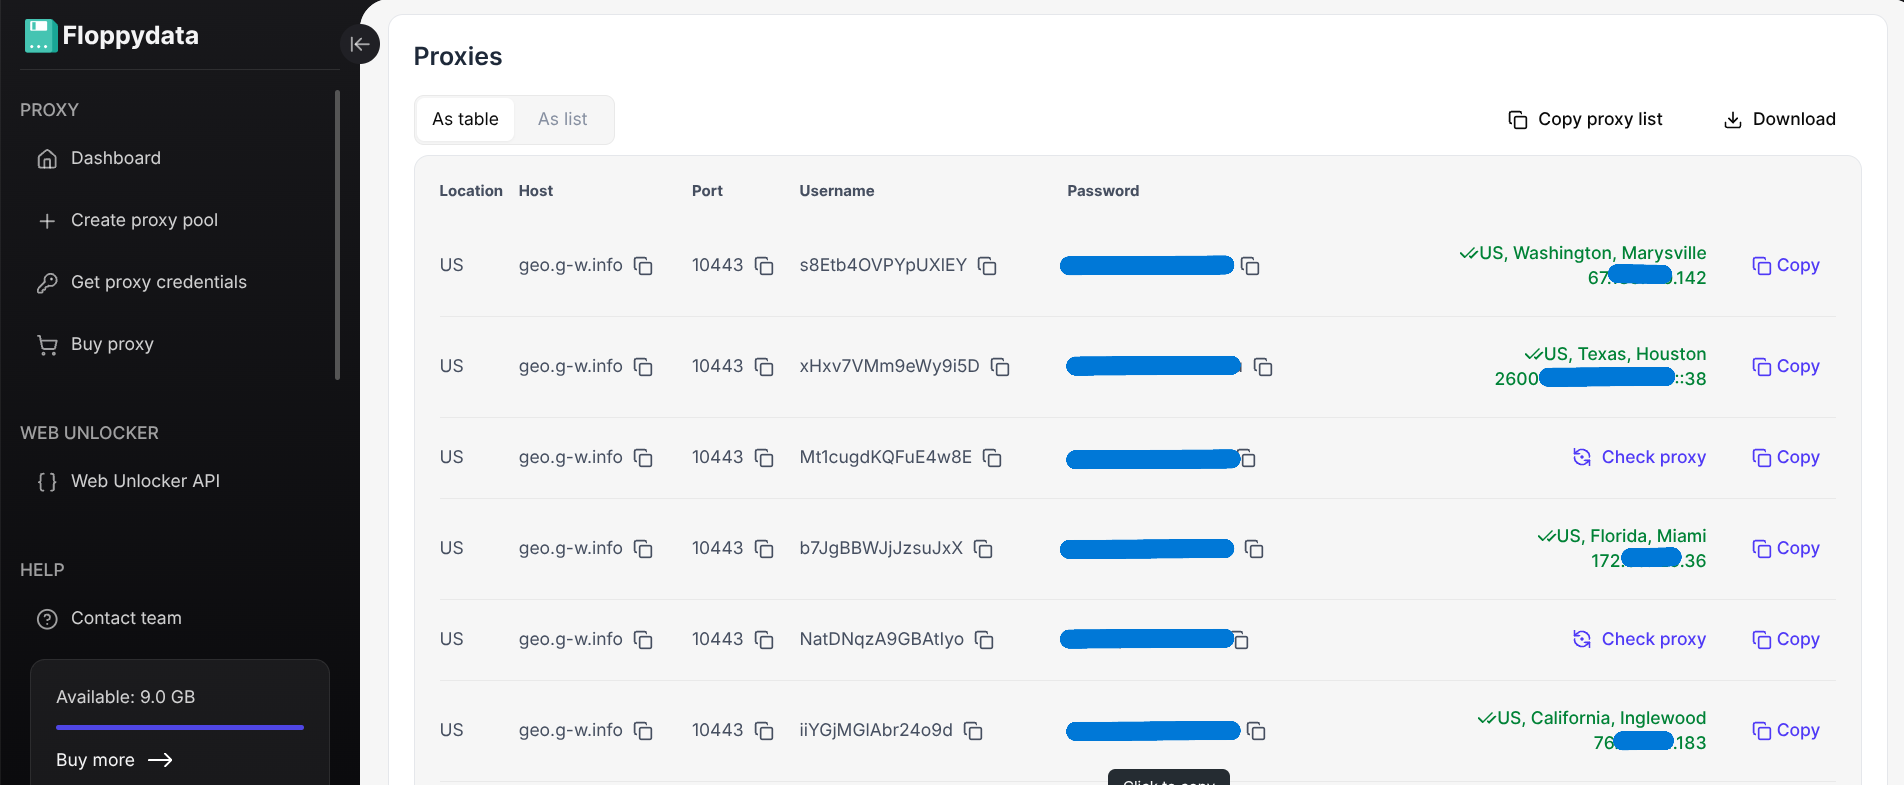
Copy relevant details about a proxy, then go to the Gologin dashboard. Find the browser profile you want to connect Floppydata proxies with, open its settings, and in the “Your Proxy” section, paste the proxy details you copied from Floppydata.
You’ll see a green dot and the location of the proxy showing a successful connection.
4. Launch Your Profile and Log in Your Accounts
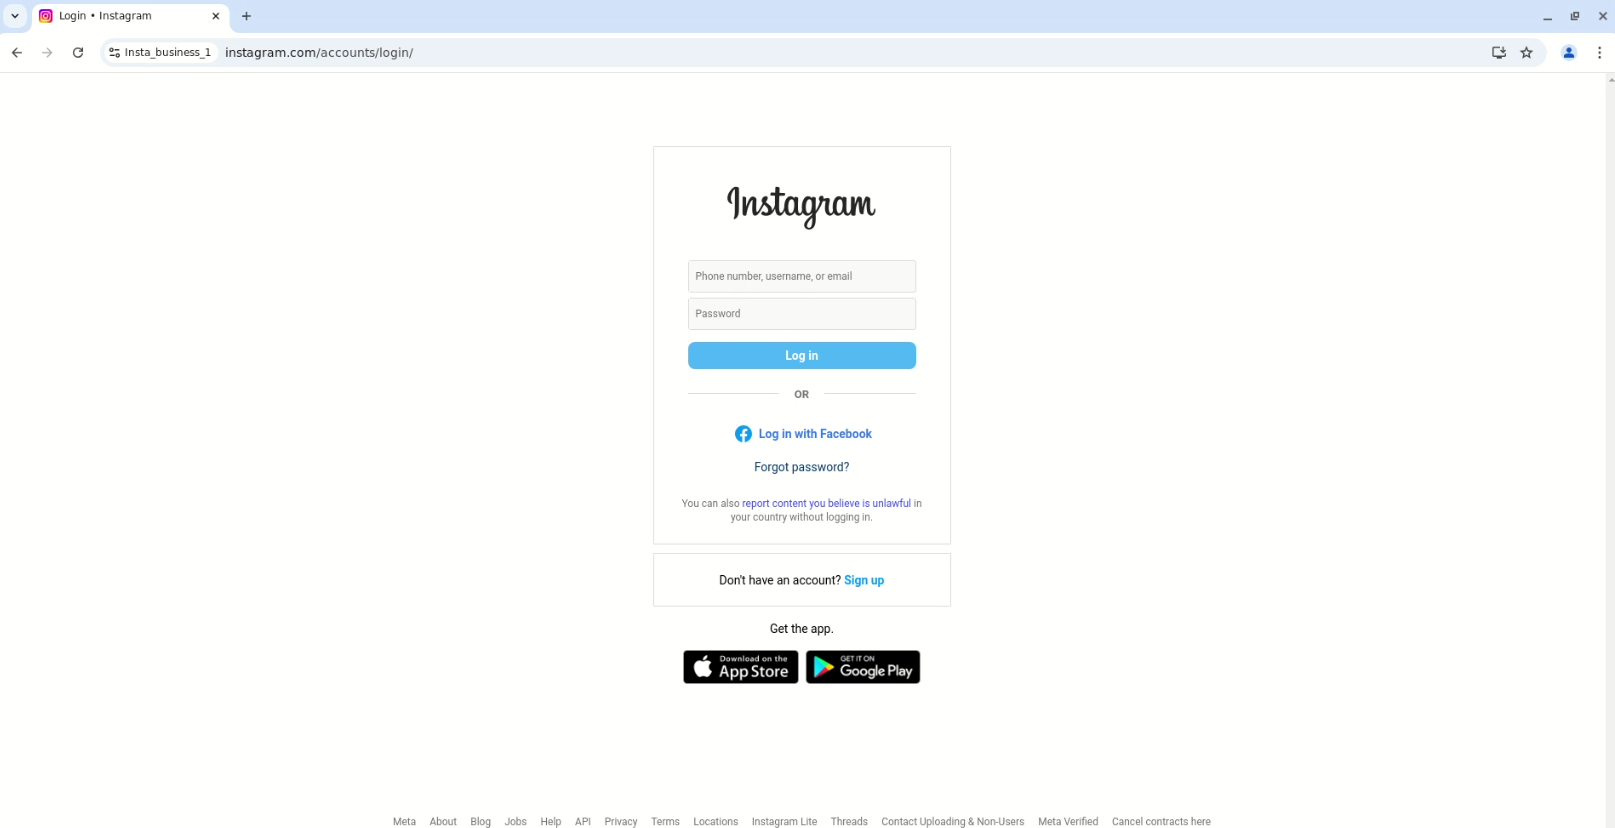
Now click “Run” next to a profile’s name and it’ll open in a browser window. The window will look like it’s Chrome. In the new tab, visit any website, like Instagram, and log in to an account.
You can repeat the same process and create as many browser profiles as you want for more accounts of the same services.
That’s how easy multi accounting gets when you use a good multi account browser with a secure proxy provider like Floppydata.
FAQ
What is multi-accounting?
Multi-accounting is when one person operates multiple accounts on a platform (social, gaming, or services) to manage tasks, test features, or scale campaigns. It needs careful setup to avoid bans or detection.
Why do people use multi-accounting?
Users run multiple accounts for marketing, automation, testing, region-specific tasks, or managing clients — but platforms often monitor for abuse or linked behavior.
How does multi-accounting work safely?
Use unique IPs (via proxies), separate browser profiles, distinct fingerprints, and consistent behavior per account so systems can’t link sessions back to one user.