
What is Google Chrome?
You’ve probably used Google Chrome at least once, just like a lot of people. For many, it’s become a must-have for getting work done, studying, or just browsing the web for fun.
Chrome is a free web browser made by Google. It first came out in 2008 and quickly became one of the most popular browsers. It now holds a large part of the market.
Fact: the name Chrome comes from chromium, which refers to the frame you see around a computer window. The goal was to design a browser with a clean look, making the frame nearly disappear.
Key features of Chrome:
- Speed – Chrome is famous for loading pages quickly and handling web apps well.
- Easy to use – it has a simple layout that makes it user-friendly.
- Lots of extensions – you can add a bunch of extensions to customize the browser just how you want it.
- Sync your stuff – it keeps your bookmarks, history, and other data up to date across all your devices.
- Works with Google services – Chrome connects easily with Gmail, Google Drive, and Google Maps.
Step-by-Step Guide to Setting Up FloppyData Proxies in Google Chrome
Google Chrome, like most modern browsers, supports the use of proxy servers. Let’s explore one method to integrate FloppyData proxies into the widely-used Chrome browser.
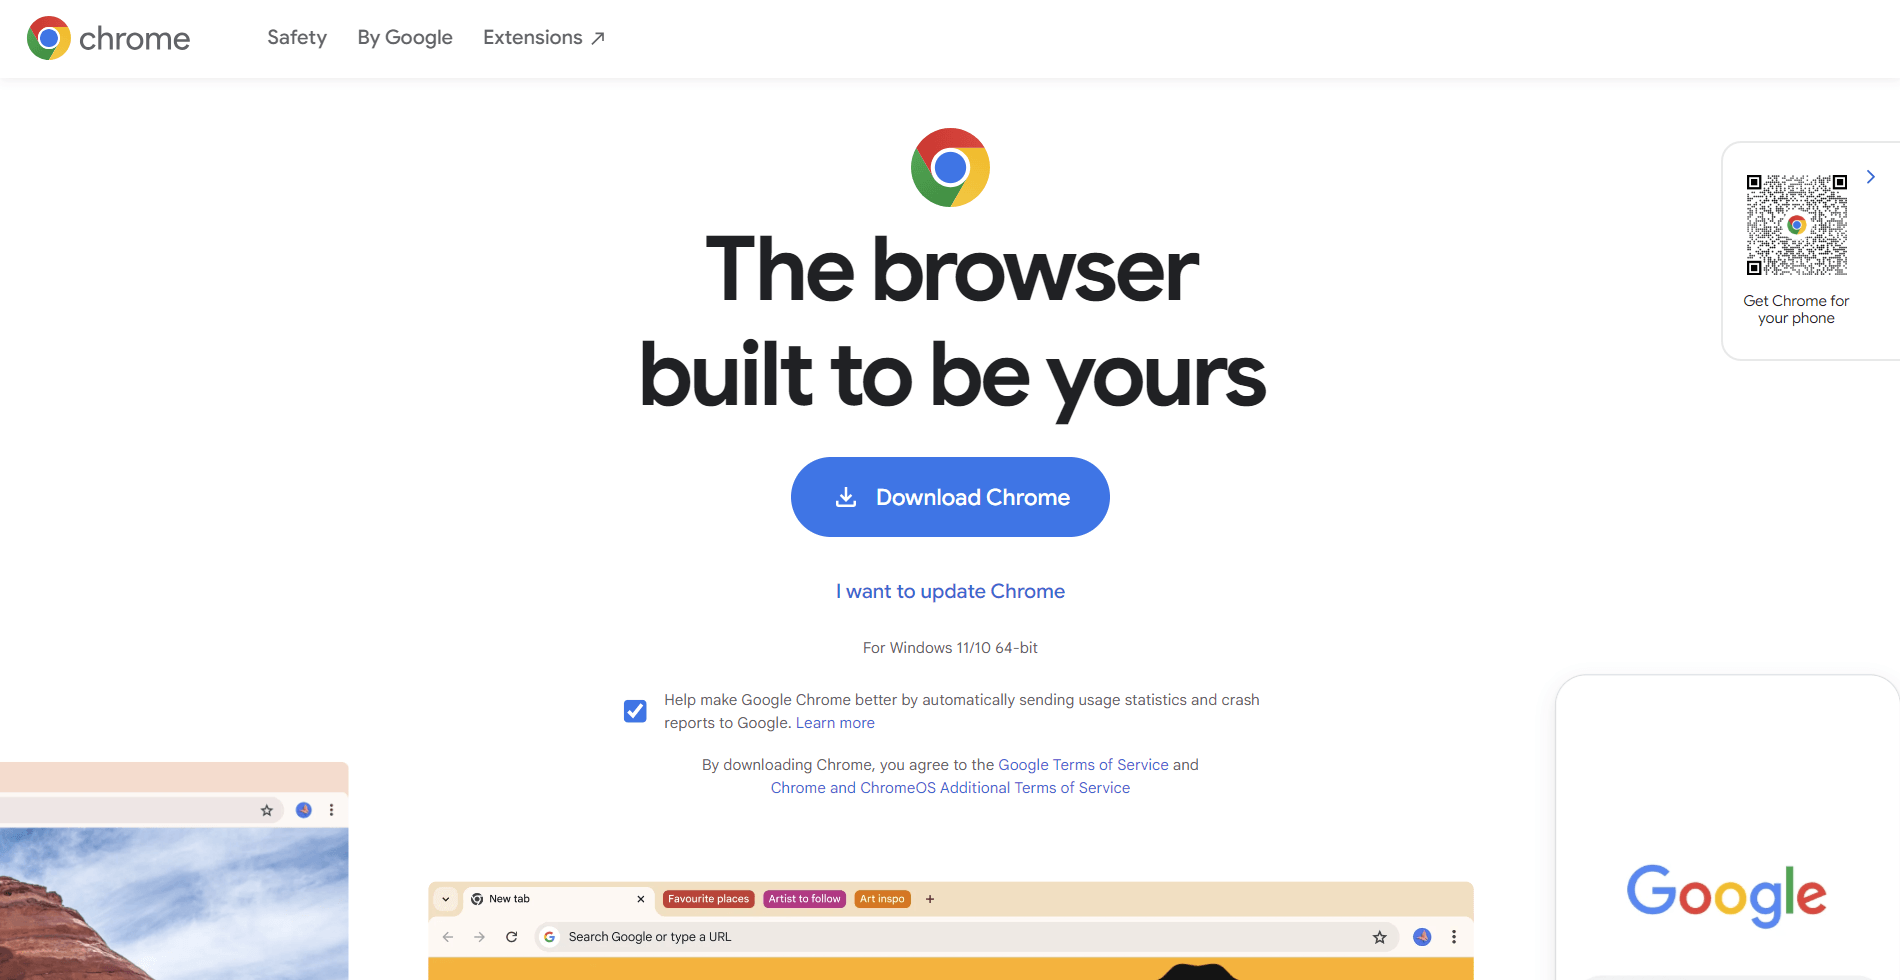
- If you don’t have Google Chrome installed, go to the official browser download page. Download and install it on your computer.

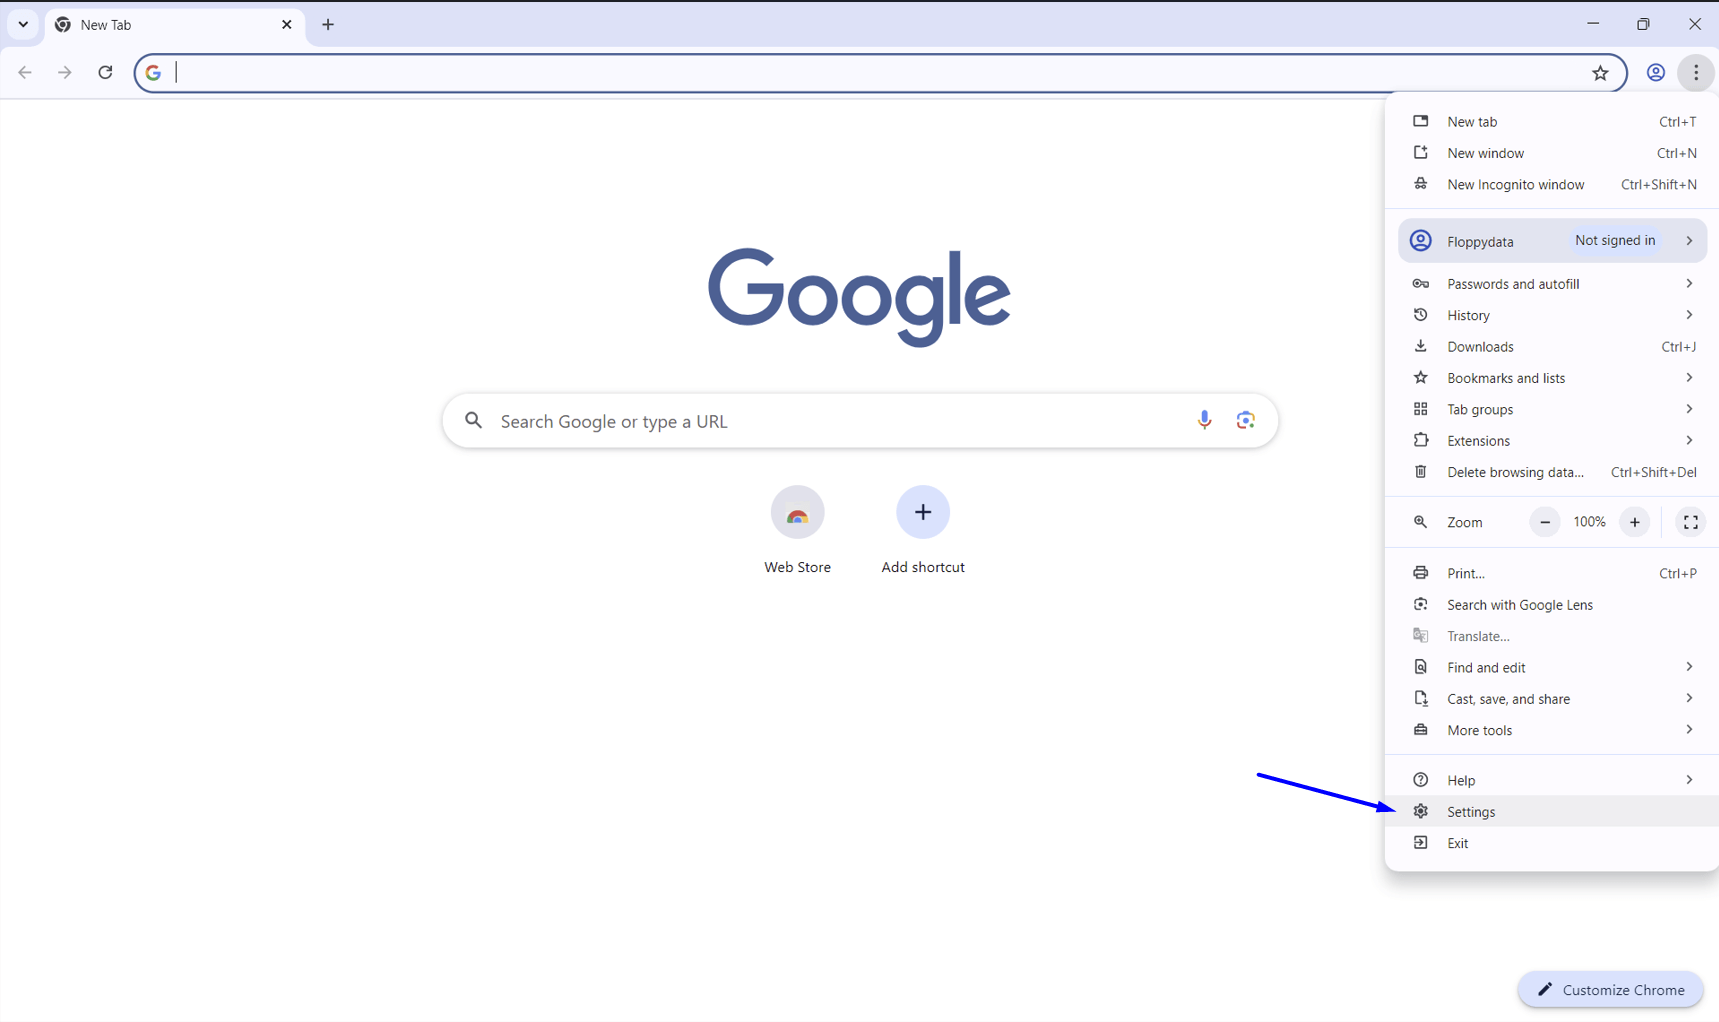
- Launch the chrome browser and go to the chrome settings. To do this, in the upper right corner, click on the button with 3 dots -> Settings.

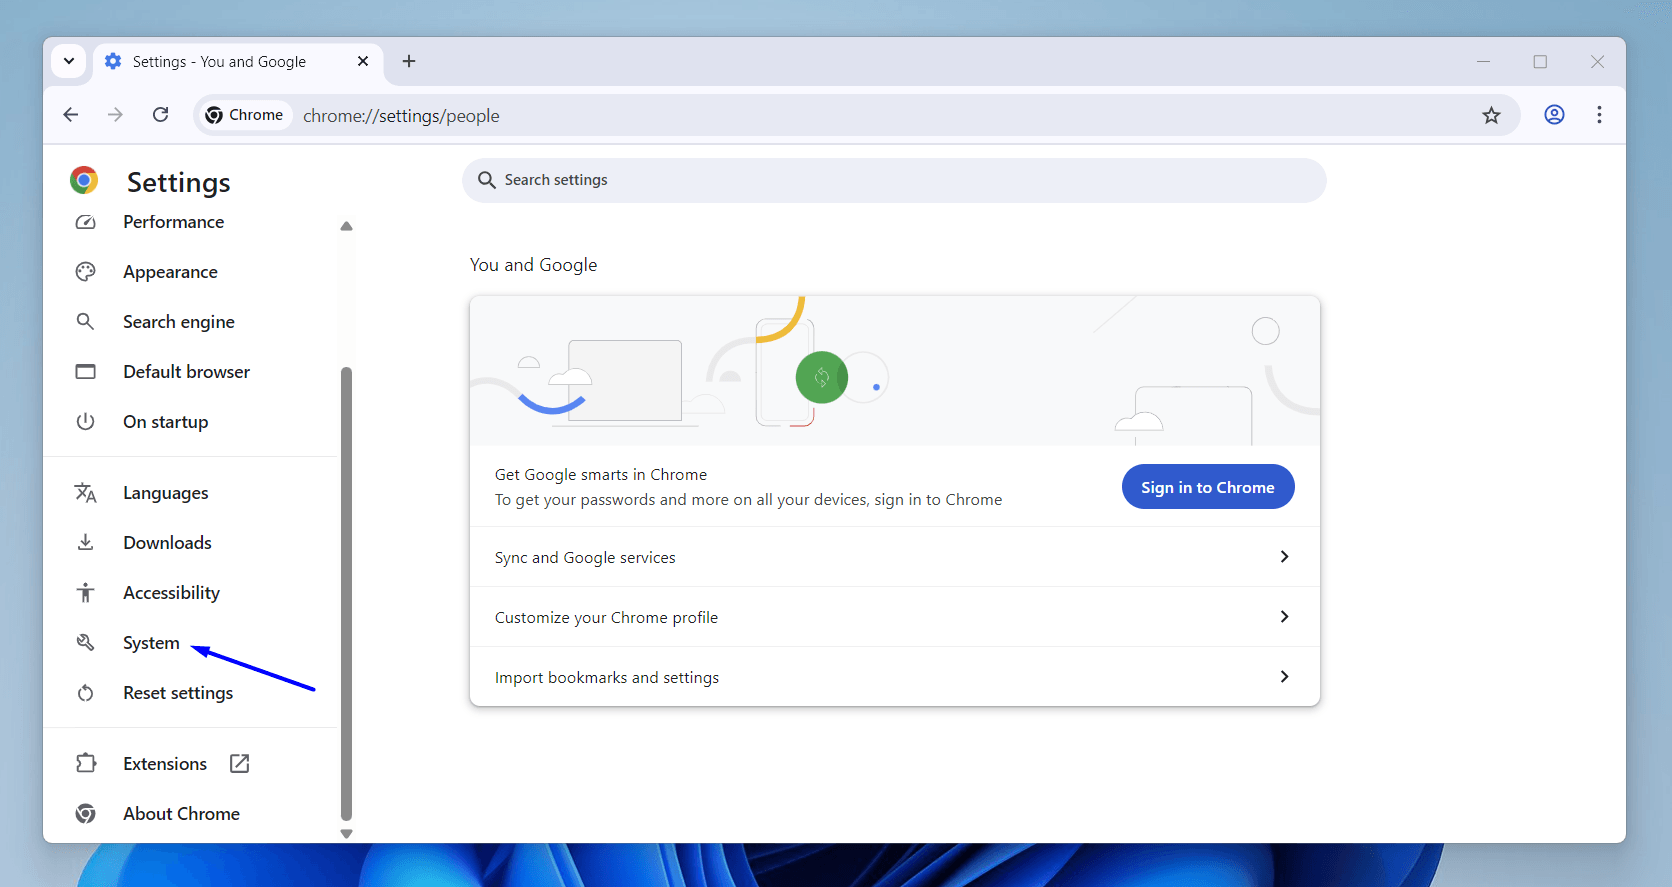
- In the opened settings window, in the left menu list, find System and go to it.

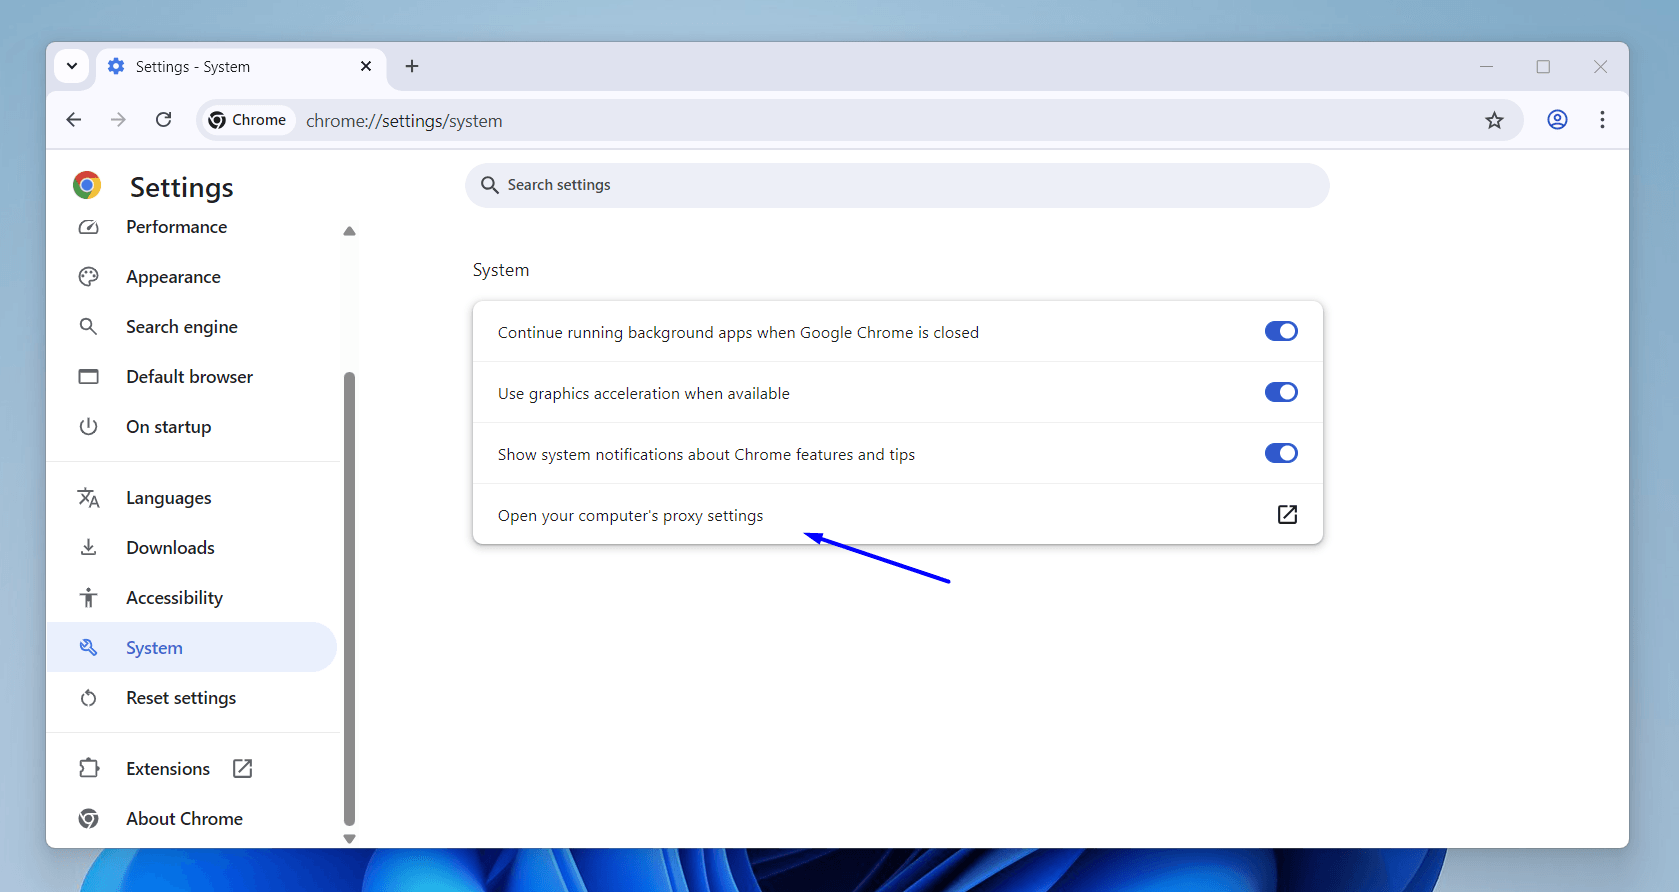
- Next, find the last item Open your computer’s proxy settings and click.

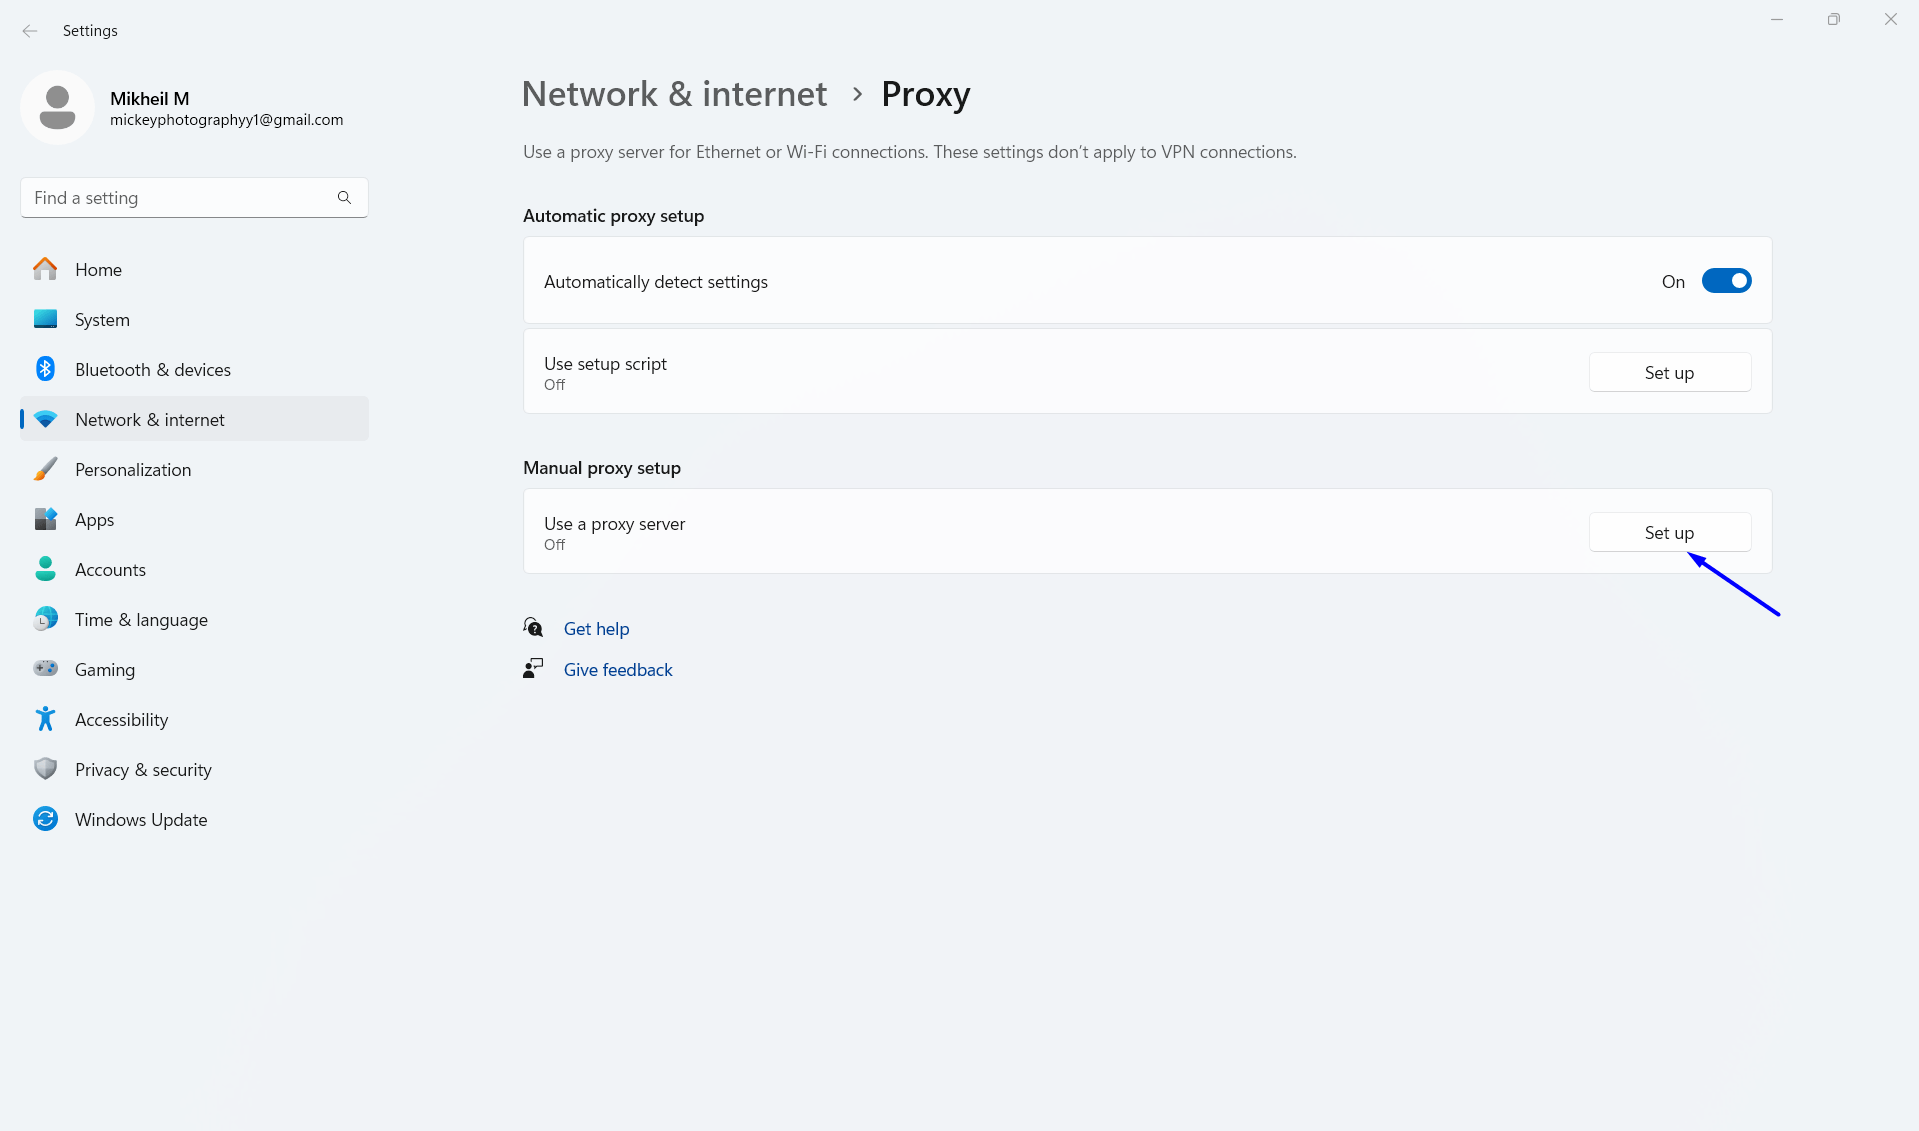
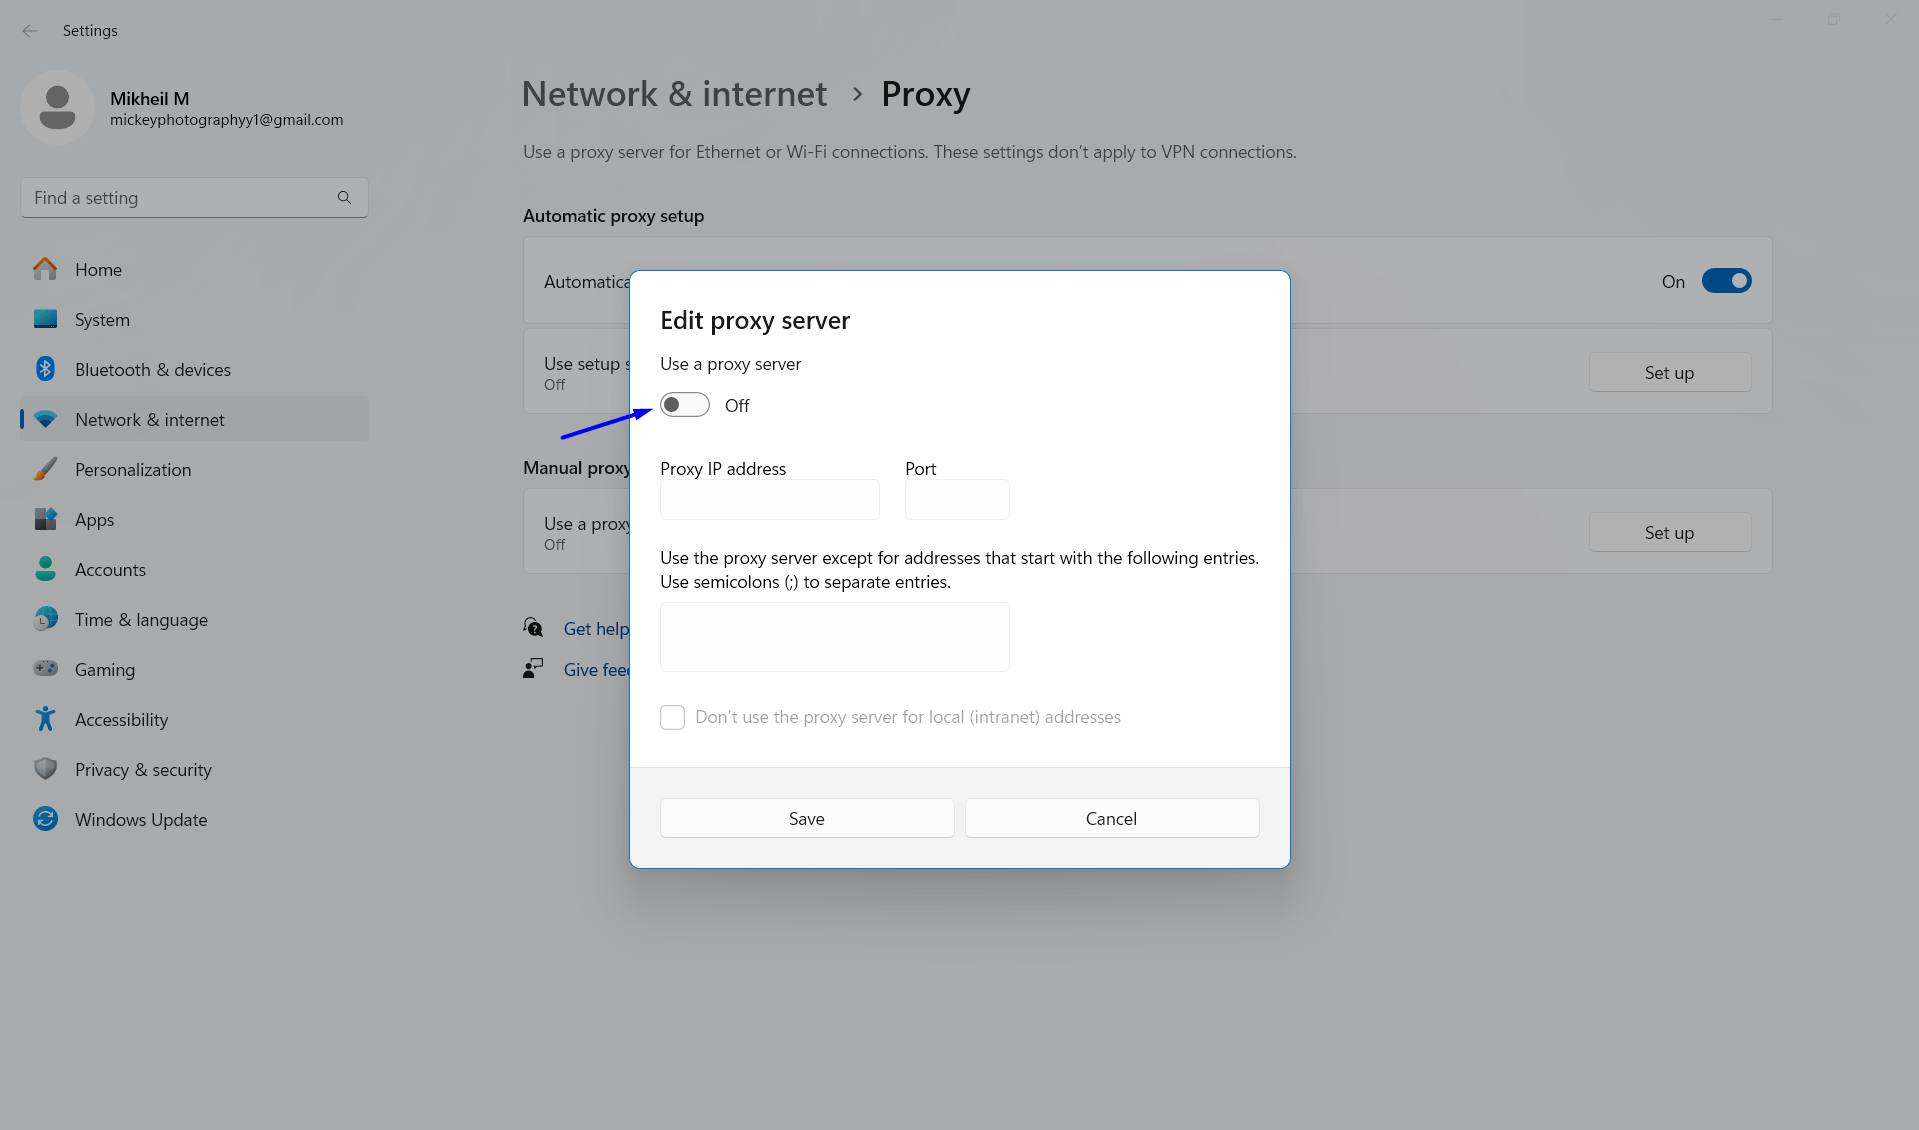
- The proxy settings window for your device opens. In the Manual proxy setup section, click – Set up for Use a proxy server.

- Opens a window to configure your proxy settings, activate it by clicking use a proxy server – ON.

- Go to FloppyData, log in or create a new account.

- In your account, click Create proxy pool, specify all the necessary settings, and save by clicking Create new proxy pool. You will see a list of proxies. Copy the necessary data, in our case, the host and port.

- Insert the host name and port and click Save.

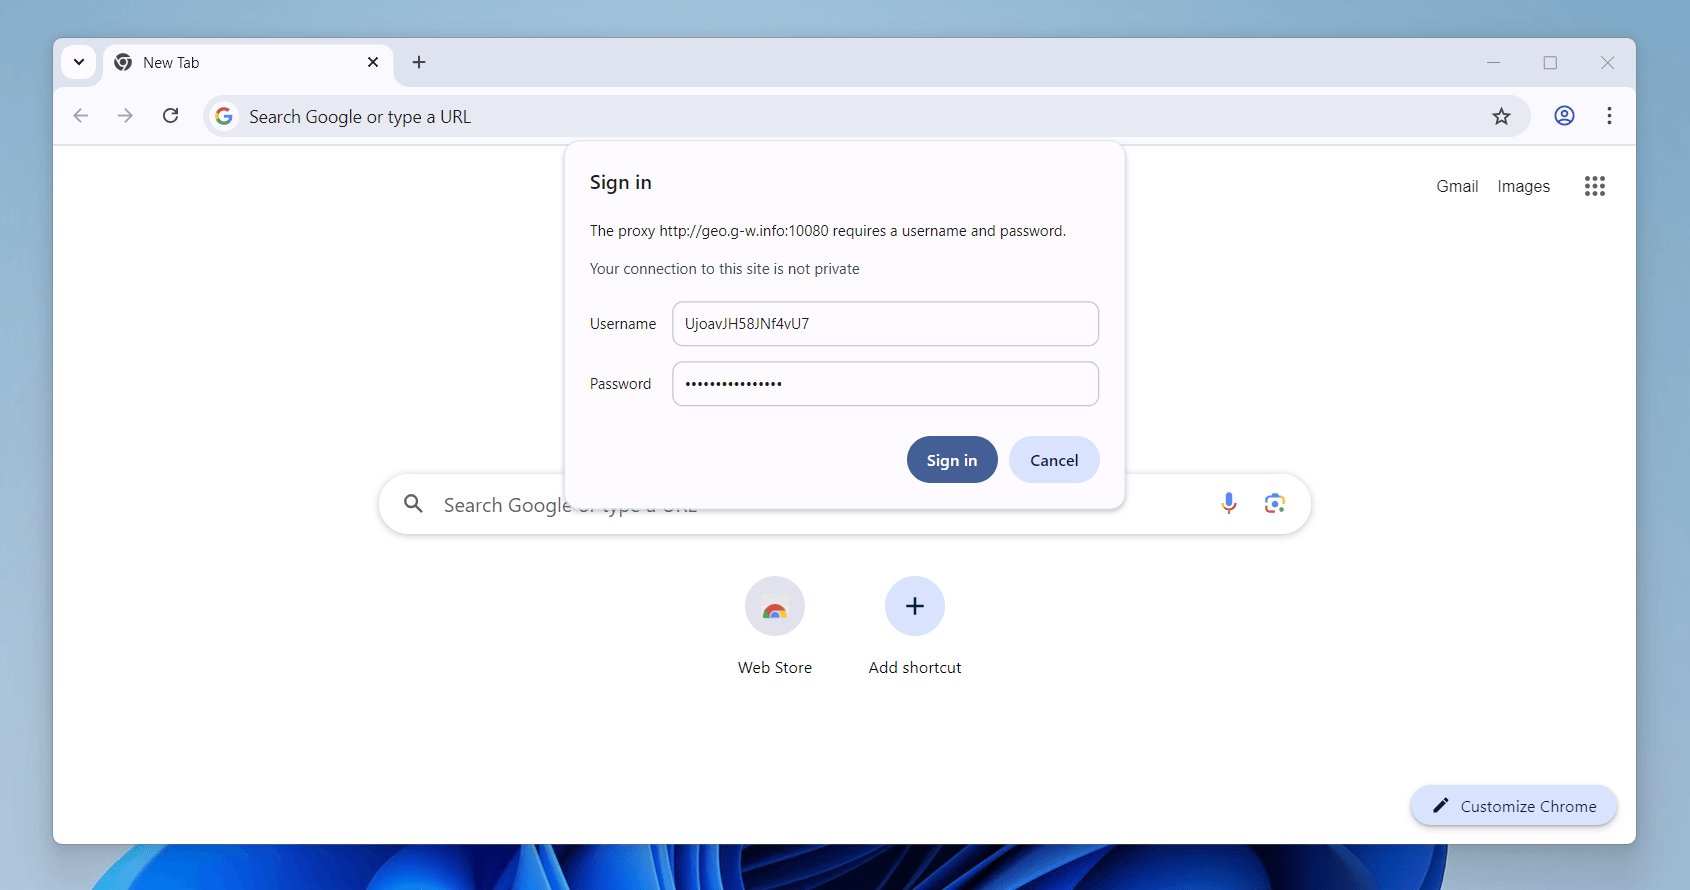
- Go to Google Chrome, you will immediately be greeted by a small pop-up window to insert the proxy authentication Username and Password. Insert and save by clicking sign in.

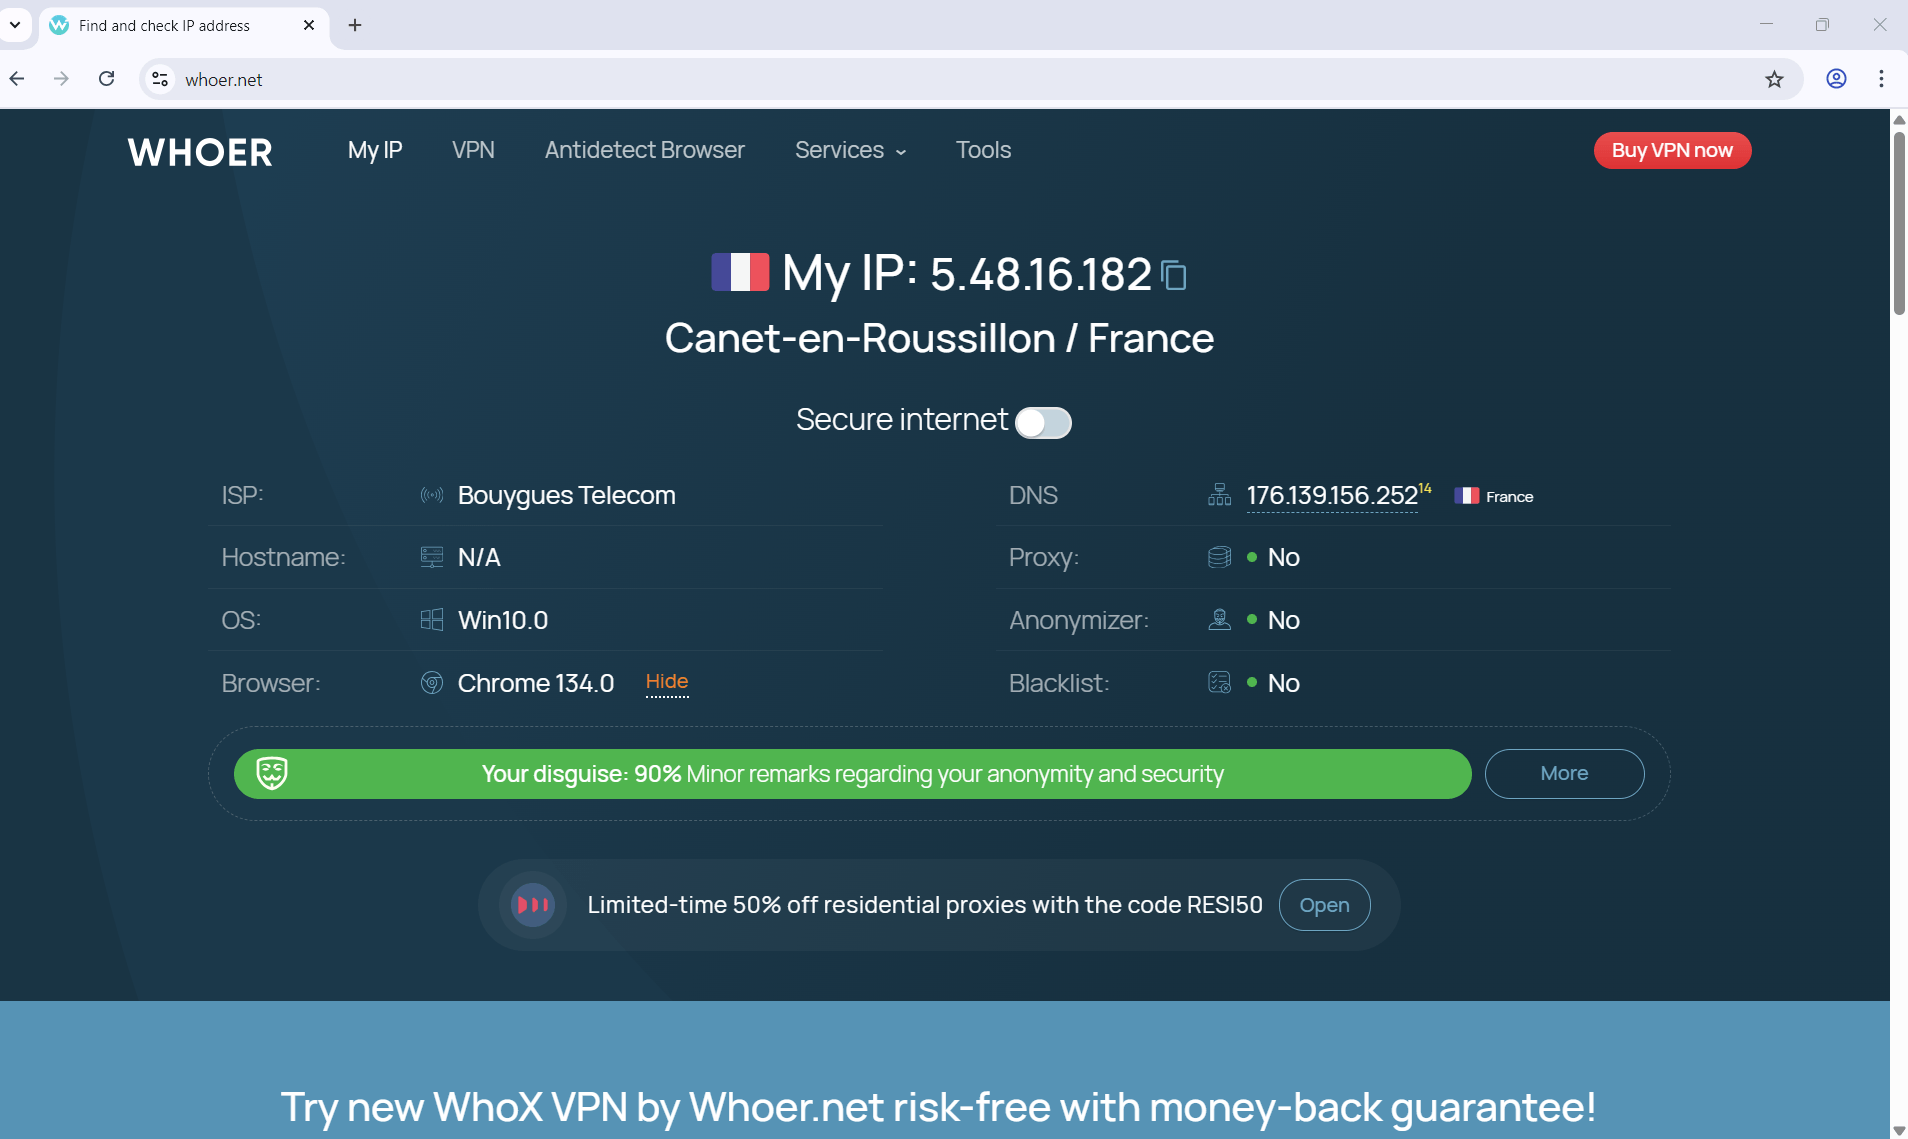
- The proxy is ready for use, to check, go to Whoer.com or any other IP checker and make sure everything works fine.


Why Choose FloppyData for Google Chrome Proxies
- Enhanced Anonymity and Security — Your IP address security level will improve when you use Google Chrome alongside the powerful FloppyData proxy network to hide your online location.
- Reliable and Fast Connections — FloppyData proxies are designed to work swiftly to give you uninterrupted online sessions.
- Diverse IP Pool — Use our proxy network to select residential mobile datacenter IP addresses which help you solve problems in multiple online business areas.
- Unbeatable 99.8% Success Rates — Our service connects effectively 99.8% of the time to accurately scrape data and control accounts.
- Unbeatable 99.99% Proxy Uptime — The proxy system stays online all day long to deliver continuous services.
- Unbeatable 95% Clean IP Rate — 95% of FloppyData’s IP network maintains clean status to prevent online detection and blocks.
Final Thoughts
Google Chrome is definitely one of the most popular web browsers out there. It’s fast, easy to use, has a ton of extensions, and works well with all Google services, making it a must-have for a lot of people.
The ability to configure residential proxy servers, as shown in the example with Floppydata, adds flexibility and security when working on the Internet. Despite some shortcomings, Chrome continues to evolve and adapt to user needs, maintaining its leading position.
FAQ
How do I configure a FloppyData proxy in Google Chrome?
Go to Chrome’s menu → Settings → System, and click Open your computer’s proxy settings. In the system dialog, enable manual proxy setup, enter the host and port provided by your FloppyData proxy pool, save the settings, and optionally authenticate when prompted by Chrome. Add credentials if needed, then test the connection using a site like Whoer.com to ensure the proxy is active.
What are the benefits of using FloppyData proxies with Chrome?
FloppyData proxies offer high-speed, reliable connections with 99.99% uptime, 99.8% request success, and a 95% clean IP rate. When paired with Chrome, this setup improves privacy, helps bypass geo-restrictions, and delivers seamless browsing performance.